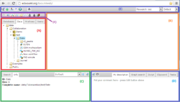
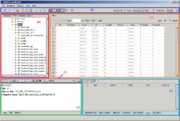
Information box


Information box is the pane in the bottom left part of the window, which always contains two tabs - one for the property inspector (the Info tab) and the other for the text search engine (the Search tab).
Property inspector
Under the Info tab you will find short descriptions of the database or element selected in the repository pane, as well as of graph components selected in the document pane. In many cases, you will just see the name of the element as ID, or the complete path displayed in the field Complete name, and the number of child elements right under the activated collection as Size. In case the activated element is a table, the number of rows in the table will be indicated as Size. Optionally, a Description is shown as well, if it was added when the element was generated.
The information shown on the Info tab can be viewed in a separate window or browser tab by clicking the button ![]() .
.
By clicking on the icon ![]() you can edit some of the information in a separate Edit window.
Gray fields cannot be modified. The contents of fields with white background can be changed manually. Additional information can be entered in the pink fields, which will then appear on the Info tab, if the changes are saved (the Save button).
you can edit some of the information in a separate Edit window.
Gray fields cannot be modified. The contents of fields with white background can be changed manually. Additional information can be entered in the pink fields, which will then appear on the Info tab, if the changes are saved (the Save button).
Depending on the type of the element that you have selected in the repository pane, different types of information can be selected for the display on the Info tab. This can be done by selecting an information type from the drop-down list next to the operation icons in top right corner of the tab. Initially the box shows “Default”.
Search
The Search tab of the information box is used for full text searches through a selected data collection.
To run a search select a database or its subcollection in the repository pane, then, in the Search tab, enter your search string into the search field. The search field is accompanied by a search suggest drop-down list, so the user can select an item without typing its complete name. Having entered your query, click on the button(![]() ).
).
The results will be displayed as a table in the Search results tab of the viewparts area (in the bottom right part of the window). The Search results tab also contains icons for the available operations on the search results:
-
 - add to diagram - active if the document opened in the document pane is a diagram; select an element in the search result table and click on the icon, then check the location of the new element on the diagram by a left click. If the diagram supports this type of elements you'll see a new element on the diagram or an error message otherwise.
-
 - full mode - sets the full mode of the search result table, in which the height of each table row is enough for the cell content. Click one more time to return to compact mode, in which the height of each row is fixed, so the table is compact but some text is hidden. The default view is compact.
-
 - export search results - exports the table to a file; in a special dialog you can select the format, export columns and rows and set the compression mode.
-
 - save search results table into repository.
-
 - add selected elements to clipboard.

